November 12, 2012

November Sensory Tubs

Today, the children will be introduced to the November sensory tubs.  Yes, November is half over, and I have been slooooooow at collecting things to put in this month's tubs.  It was kind of hard to come up with ideas for this one!
 
But nonetheless, here it is.  Ta da!
 
Our November sensory includes:
  • yellow-dyed rice (which will very quickly be mixed with the underlying orange rice!)
  • plastic mini red gourds
  • tea cups and orange spoon/scoop
  • real mini pumpkin and white gourd
  • Pilgrim and Native American stand-ups
  • Mayflower stand-up (not pictured)
 
I hope the kiddos enjoy these bins!
I'm sure they will, because they always ask to play in them.  We end up with lots of rice on the floor, but they are doing such a great job scooping and pouring!
 
I love activities like this that the kids and I both get excited about, and that provide sensory stimulation, as well as fine-motor muscle development.
 
Yay for sensory tubs!

November 11, 2012

Thankful Quilt

This week we were busy with parent/teacher conferences and learning all about The First Thanksgiving.  Can you believe that Thanksgiving is just right around the corner?  It snuck up on me this year!
 
As part of our month of thanks, we decided to make a Thankful Quilt.  (Since names are listed on each paper quilt square, I decided not to include a photo on our blog.  You can check it out in person on the wall outside our classroom.) 
 
I simply adore every answer that the children gave!
When I asked, "What are you thankful for?  What makes you happy?", the kiddos gave very sweet, innocent and thoughful responses.  Please take a moment to read the answers your child gave, as well as those of the rest of the class.  They are just amazing!
 
On Friday, we learned about Pilgrims and Native Americans.  We read the books:
T is for Turkey: A True Thanksgiving StoryMy First Thanksgiving
 
to learn about the story of the first Thanksgiving.
 
We looked at pictures from the book:
 
Samuel Eaton's Day: A Day in the Life of a Pilgrim Boy
 
and compared our clothing to that of the Pilgrims, as well as chores that the children did then and now.  It was very interesting to the kids!  They did not realize how much work children had to do at that time.  Quite a change from today, for sure!
 
We are still working on the letter Ii and will wrap that up on Monday, along with introducing the letter Jj.
 
Happy Weekend! 

November 6, 2012

I Am Thankful For...

On Monday, we began our month-long celebration of Thanksgiving!
 
We read the book:
Thanksgiving Is for Giving Thanks
 
We gave lots of examples of things to be thankful for, or in a preschooler's mind, things that make us happy.  Many children cited food, toys and family - all things that are central to their world right now.
 
I didn't get to snap any pictures, but we also worked on our paper Thanksgiving Quilt.  I asked each child individually to name a few things that they're thankful for, wrote it on a colorful quilt square of their choice, and they decorated it with fall stickers.  All the children did a great job, and were very thoughtful with their responses.  We will hang the quilt outside of our classroom for all to see, and I will post pictures on our blog as well.  I am thankful for twelve amazing little pre-kindergarteners who brighten my days, make me laugh, and are pure blessings from above.  :) 
 
We finished up assessments for our upcoming conferences, including a cute monster color-by-number page.  The sandbox and easel centers were open, and loved by all.  These kiddos sure do love to paint!  Picassos-in-the-making, perhaps?  Yes, I think so!
 
See you on Wednesday! 

November 4, 2012

Hh is for Hand and Heart

Who knew so many body parts begin with Hh?!
 
This was a discovery for many of our kiddos!  We learned that hair, head, hands and heart all start with the letter Hh.  We made the /h/ sound, and felt our breath on our hand as we did so.  Ask your kid to show you!
 
 
We practiced skywriting Hh and naming many Hh words. I traced each child's hand and drew a heart inside to color. The kids also traced a dashed Hh, and learned the Hh sign.
 
Happiness!

Gg is for Green Glowstick

I made some green-tinted salt, and got a green glowstick wand for our letter Gg activity.
 
The kids used the glowstick like a pencil to form Gg in the salt.  They loved it!  They did a very good job writing Gg as well.  Usually the straight, stick letters are the easiest for them to form at this point, but most kids are getting the hang of the curvy letters too. Great!
 
 
During this individual activity, I asked the children to make the Gg sounds - hard /g/, like goat, and soft /g/, like giraffe.  I think it is equally important for them to learn hard and soft consonant sounds, just as it is to learn short and long vowel sounds.  The more their brains are exposed to these different sounds, the easier it will be for them to start reading!
 
We also learned the sign for Gg, and talked about lots of Gg words.  Ask your kiddo to name a few, and even find some around the house.
 
Groovy! :)

Fall Festival and My Marvelous Mustache

Hello!
I bet you're wondering where our posts have been, right?  Well, things have gone from slow and steady to run as fast as you can in our classroom!  (And for me, outside the classroom as well.)  I think it's just that time of year, with holidays approaching, that life tends to speed up.  So, I'm going to try my best to get you all caught up (minus two weeks ago), and stay up to date on our classroom happenings. 
 
Last week, we had a ball at our Fall Festival party.  We broke up into two groups to enjoy even more fun and games.  In the block room, the kids played the pumpkin crawl, pumpkin bowling, and jack-o-lantern toss.  In the classroom, they fished for Frankenstein, stamped faces on pumpkins, played in the rice sensory tubs and made googly eye necklaces. 
 
We read:
The Little Old Lady Who Was Not Afraid of AnythingHappy Halloween, Curious GeorgeHAPPY HALLOWEEN, CURIOUS GEORGE by Raymond, N. T. (Author) on Sep-22-2008 Board Books
 
For snack, we had orange drink, a pumpkin cookie or bat brownie, and...
 
Air-Popped Popcorn!
 The kids were amazed, and kept asking us to make more popcorn!  They even jumped up and down to help the popcorn pop.  Total cuteness! 
 
Here are the not-so-scary googly eye necklaces we made.  This craft was based on an idea I saw from Make and Takes.  Check it out - she has lots of other fun and super silly googly eye jewelry that you can make with your kids!

 
The highlight of our week, however, was our Wednesday theme - My Marvelous Mustache.  Oh yes, we had great fun with this one!  This was probably the goofiest, most fun lesson we've taught yet!
 
We read the book Moosekitos, about a moose family reunion that is invaded by mosquitos.  Moose's mustache and glue saved the day!
 
Moosekitos : A Moose Family Reunion
 
The kids played for quite awhile with mustaches-on-a-stick, and they also liked the Mustache Match.

Then, of course, we all had to try the stick-on mustaches.  What a riot!
Honestly, I don't know how guys do it.  That mustache just about made me sneeze, it was so itchy!
 
 
This was a roll on the floor, laugh til you cry kind of day.  The best, for sure!


October 19, 2012

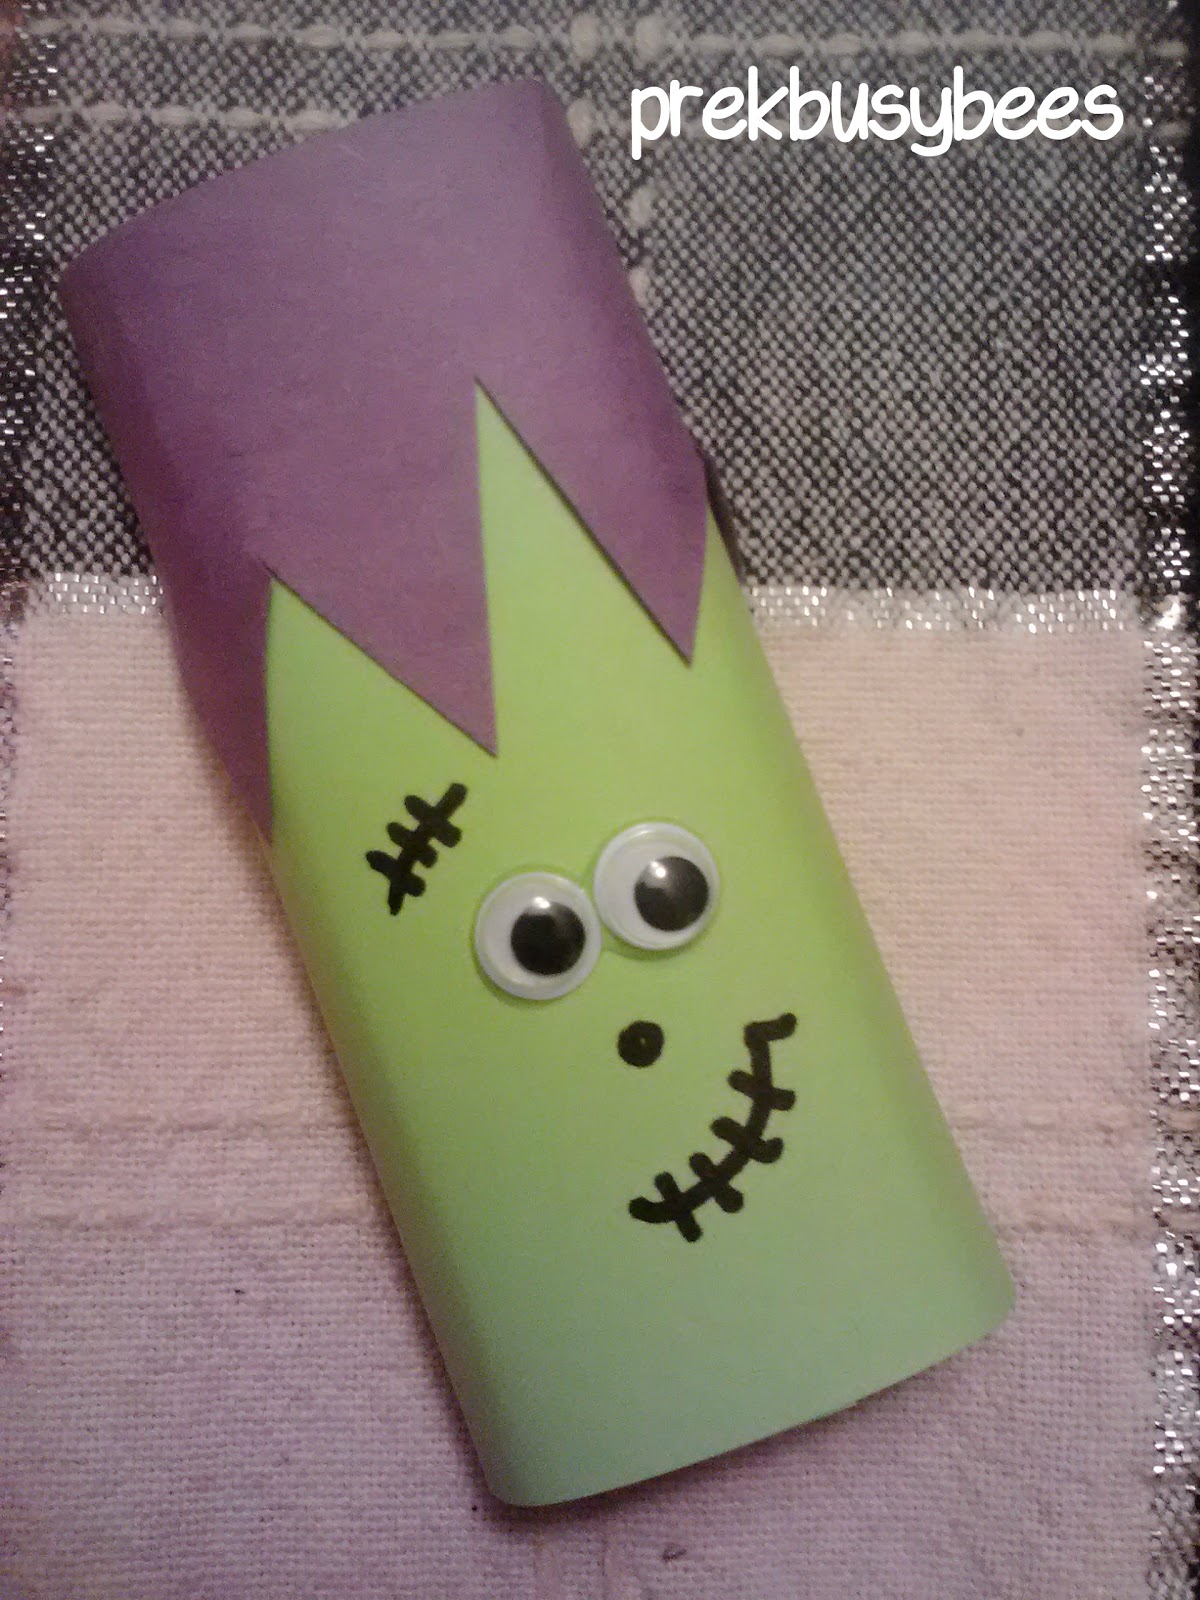
Frankenstein Candy Wraps

Since we played our Fishies for Frankenstein game on Wednesday, and I had been scouring Pinterest for ideas (that site is addicting, right?!), I decided to give the kids a special treat to celebrate Fall Break.  I didn't find quite what I was looking for online, but when I was in the Halloween aisle at the grocery store, it hit me - Frankenstein Candy Wraps!
 
These are super easy, and pretty quick to whip up.  Here are the supplies you'll need:
 
  • Scotch tape
  • Glue (I used Elmer's clear gel) or glue dots
  • Black Sharpie
  • Small googly eyes
  • Purple (or black) construction paper
  • Green Post-Its, 3x5 size (copy or construction paper would also work)
  • Scissors
  • Fun-size candy bars (I used Kit Kats)
 
First, tape the ends of the candy bar wrapper down.  Place your candy bar on the green Post-It, and wrap around, so that the end of the Post-It lies on the back of the candy bar.  Even though the Post-Its have a sticky component, I still taped mine, since they don't seem to stick very well when you curl or wrap them.


Next, cut a strip of purple construction paper about 1"x4".  Cut uneven triangles across one long side (this is the hair).  Place Frankenstein's hair over the top of the green wrap, and tape in place on the backside.
 
Now you'll add the facial features with your Sharpie.  Be creative and make your Frankensteins as cute or scary as you'd like!  I didn't want to scare my pre-k kiddos, so I made mine cute and friendly.  :) 
 
Glue on the googly eyes, and make sure to add a scar toward the top, and over the left eye.  Give him a nose and a stitched (or unstitched) mouth.  For girls, you could even add a little bow with pink or red construction paper (or ribbon) and maybe even eyelashes!

 
Now your sweet treat Frankensteins are ready to be gifted!  My kids gave each of their teachers one with a little note saying "Happy Fall Break!".  Let your kiddo help you make a batch for friends, a party or even a random act of kindness.  :) 
 
Happy Fall!