January 30, 2013

Penguins, Part 2

Hello!  I know you're all loving this weather, right?!  (You may hear just a *hint* of sarcasm at this point!)  One day it's 12 degrees, the next it's 50 and currently, we've got showers of icy, cold rain falling down!  Wonder what kind of weaher is in store for tomorrow?
 
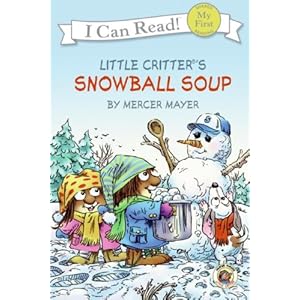
Today, we had lots of fun learning more about penguins.  We read the book:
Penguin Pete and Little Tim
In this book, we learned that penguin babies are called chicks, and that penguins are birds that have feathers and wings, but do not fly.  They do love to swim though!
 
In art, we finished our cardboard roll penguin craft.  My hope is that your child will play with his/her penguin at home, and that you will hear some penguin facts during playtime.  For instance, penguins like cold weather, and they love to eat fish!

Our math center had two games for the children to play.  This one is a Penguin Mommy and Chicks math match, in which we used black and white unifix blocks as the chicks and Emperor penguin cutouts at the mommies.  We numbered the moms 1-10, and had the kids match the same number of chicks to the mom.

The other math game was a penguin roll and cover, which I found online, but now can't remember where!  So, to whoever created this cute game, thanks!  The kids rolled a die (numbered 0-5), and placed the same number of goldfish crackers on the penguins.  What do you think happened when they were finished with the game?  Yep - the kiddos got to munch their goldfish!

I also like to incorporate simple science experiments whenever I can, and I thought the sugar cube experiment would be perfect to complement our penguin study.  We stacked up the cubes in a pie plate, and pretended they were icebergs for the penguins.  Each small group of kiddos chose the color they wanted for the water in the pitcher, dropped in some food coloring, and poured the water in the pie plate.  Then the magic happened!  The children were amazed to watch the sugar cubes change color and begin to dissolve.  When I asked them what was happening, several said, "It's melting!" or "It's breaking!"  They are so smart!
We also talked about how the sugar cubes absorb the water, like sponges, and then the water dissolves the sugar.  These experiments are very hands-on for the children, and when they get to participate by doing, it makes the activity more meaningful and interesting for them!
 
Other activities today included:
  • playdough and easel
  • dry erase writing and drawing
  • block room
  • penguin action rhyme
Our closing story was:
Snow Dance
And for those of you who are still trying to figure out who Chilly Willy is, take a look here for a throwback:
 
Have a wonderful Wednesday!

January 29, 2013

Penguins All Around!

Look who greeted me when I walked into class on Monday morning!
Oh yes, the Tigger Bandit strikes again!
I love coming in and seeing things like this first thing.  It just puts a happy, positive spin on the whole morning.  I definitely had a good chuckle, as "Cool Tigger" chatted on his cell!
 
When the kids came in, they wanted to see their gummy bear science experiments.  They were pleased to find that most of the gummy bears grew a little, and that the red ones ended up with a slight hint of red water.  They also observed that the gummies were covered in bubbles!  This was a simple experiment in which the kiddos learned to patiently "wait and see" to observe changes.
 
During Circle, we reviewed the letter Pp and introduced Qq.  We began our discussion on penguins, and the children excitedly told us all about their trips to the zoo to see them!
 
We read a very informative, kid-friendly book:
National Geographic Readers: Penguins!
 
Our Centers included Penguin Play, where they got to imagine and create their own stories with {my favorite} Madagascar penguins.
 
The children also practiced coloring and cutting a penguin.  We're intent on developing those fine motor muscles!  Also at this center, they played a penguin matching game with real-life photos of different kinds of penguins.  Miss D used a yard stick to (get in some math and) show the kids how short or tall each kind of penguin can be.  Did you know that the tallest are the Emperor Penguins, which can grow to be 4 feet tall?!  Amazing!
 
For art, we started the first part of their cardboard roll penguin, which they will finish on Wednesday.  We also built cute sticker penguins.  They could use the bow as a tie or on the head.  They turned out cute either way!
 
For our movement game, we pretended to be daddy penguins, balancing an egg (bean bag) on our feet.  Not as easy as one may think!  We tried waddling, jumping and turning around in a circle.  We also got in some letter recognition, because the bean bag set we used has letters on one side.  I asked the children to pop their "egg" back into the basket by identifying the letter on the bean bag.  They did a great job!
 
See you on Wednesday for more Chilly Willy fun!
(I know the kids don't know who that is, but you do, right?!)


January 25, 2013

Polar Bears

Oh it was fun getting to school this morning, wasn't it, friends?!  My commute is normally 20 minutes, but this morning, because of the freshly falling snow, it took 3 times as long.  Eeks!
 
We started the day in the block room, because I knew if I was late because of the roads, others would be too.  (It's just part of our lovely midwest weather, right?)  The kids had a great time playing in the gingerbread sensory tub, which they collectively decided was "inside snow".  Love it!
 
We read the books:
Little Polar Bear (reader's digest young families) (Littla Animal Adventures)Stella, Queen of the Snow (Stella and Sam)
 
We learned where polar bears live, the temperature they prefer, why their fur is white and what they like to eat.  Ask your kiddo to share some new polar bear facts with you!
 
At the science center, the children played with the polar bear play set, which included large blocks of ice, water, and later on, cottonball snow.
 
We also did a gummy bear science experiment, just like the one at Teach Preschool.  The kids poured some water into a clear cup, then dropped in one gummy bear.  We talked about what might happen to the gummy bears, and how they might change over the weekend.
 
 
They came up with some excellent ideas!  Their brains were really working hard today.  I love their responses!  We will check on the gummies first thing Monday morning, and make some observations about what happened to them.
 
Our other centers today included:
  • Art/Writing - painting at the easel, stickers (which promotes fine motor development) and tracing their highlighted names 3 times
  • Coloring - polar bear coloring page (also good for fine motor)
  • Puzzles/Blocks - variety of wooden puzzles and blocks
We also reviewed the letter Pp, and we will wrap that up on Monday.  We will also begin the letter Qq, and start our unit on penguins (my favorite!).
 
Ask your kiddo what was best about our polar-ific day!
Happy Weekend!!

January 24, 2013

MLK & Friendship Day

First of all, I have to show you what I saw when I walked into our classroom on Wednesday morning:
 
Two little Tiggers, out for a Sunday stroll!  One was dressed in glittery dress shoes, carrying a handbag, all the while pulling the other in the little red Radio Flyer wagon.  Isn't this the cutest thing?!
 
And then I turned around and just had to laugh!  Cowboy Tigger was waiting for me over by the library.
Guess who was just as mischevious as our Tiggers?  My dad!  Yes, he's the culprit in this awesome silliness.  Thanks for totally making my day, Daddy-o!
 
Now on to our lesson - Martin Luther King, Jr. and Friendship Day
 
We looked at pictures from these two books, and I summed up the information. 
Martin's Big Words: The Life of Dr. Martin Luther King, Jr.Story of Martin Luther King, Jr.
I tried to keep it simple, because at this point, preschoolers don't really see differences in themselves.  Yes, they know boys are different from girls, and that some kids have brown hair and some have blonde.  But they don't see much of a difference beyond that.  We mainly focused on the fact that Dr. King wanted everyone to be treated the same, and hoped that all people could be friends and act in a peaceful way toward one another.
 
We made this beautiful friendship dove for our art project, like the one here.  Each child chose a different color of ink to stamp with their fingerprint.  Then, we glued the dove onto a poster, and each kiddo signed their name next to their fingerprint.  It is absolutely lovely!  Please take a moment to check it out - it can be found down the hall, close to the restrooms.
 
 
Other happenings in our classroom:
  • introduced the letter Pp; learned the sign for Pp
  • colored an AB pattern for math (Ex: blue, pink, blue, pink, blue, pink, etc)
  • talked about how to be a good friend (see poster outside our classroom)
As one of our boys says, "Peace out!"  See you tomorrow!

January 21, 2013

Oo is for Orange

Last week, we wrapped up the letter Oo with an orange playdough center.  It was pretty cool to teach the kids how to first make long, skinny snakes, and then transform them into Oo's!
 
We also practiced saying the two /o/ sounds - short /o/, as in octopus, and long /o/, as in oval.  Your child now knows the sign for Oo, and should be able to name a few Oo words.  Vowels are tricky for preschoolers, but with lots of practice, they will get the hang of them!
 
During our Circle Time review of Oo, the children discovered that a special kind of singing, opera, begins with the /o/ sound.  Ask your kiddo to sing opera for you!  It was too cute watching and listening to the kiddos sing.  Some even broke out in opera during Centers!
 
For more Oo activities, check out:
 
Oodles of outstanding ideas for you and your kiddo!


January 19, 2013

White Dot Snowkids


Looking for something simple to keep the kiddos busy while you're making dinner?
 
Make some snowkids out of white dot stickers!
 
This is super easy, inexpensive, and a great quiet time activity for kids.  We used Avery 1" mailing seals, like these:
 
I got them in the office supply section at Wal-Mart, but I have seen them at Dollar Tree too.
 
Let your kid stack them up on a sheet of construction paper and add details with crayons or markers.  This is the creation my daughter made:
Her snowgirl has boots!  You can't see the top, but she also put the dots in a line and wrote her name.  She wrote one letter on each dot.
 
This is my son's winter day creation:
He added some cool facial features, but then decided he wanted his snowpeople to be robots, so he colored them gray!  Creativity at work!
 
This activity is a great storytelling tool as well.  Let your kid draw and create 'til their little heart is content, then ask him/her to tell you all about it.  What are the snowkids doing?  Where are they?  What is the weather like there?  The possibilities are endless!
 
Happy crafting with your kiddos!

Hot Chocolate Cafe

Yesterday, we had so much fun in the Hot Chocolate Cafe!
 
One of my favorite quotes of the day was when a little girl came in and said with great wonder, pointing to our housekeeping table, "What IS all that?!" It doesn't take much time for them to notice things that are different!
 
We set up the housekeeping table with cups of hot chocolate (brown tissue + cotton balls), a tray of cupcakes, kettle, plates and spoons.
 
For our math activity, we played a hot cocoa and marshmallow counting game.  The children played in pairs, and each took turns rolling a large die.  They picked up the same number of marshmallows (cotton balls) that they rolled on the die, and added them to their cup.  When their cups were full, we dumped them out and counted the total number of marshmallows.  Lots of counting going on with this game!
 
We read the books:
 
There Was a Cold Lady Who Swallowed Some Snow!A winter day
 
Other classroom activities included:
  • reviewing the letter Oo
  • building playdough snowmen and snowballs
  • making hot chocolate and marshmallows to take home to drink
  • playing at the sand table
  • painting and mixing with green, brown and white paint at the easel
  • singing the Hot Cocoa song (a copy came home in the cubbies)
It was definitely a hot chocolatey kind of day!


January 17, 2013

Build-Your-Own Snowman Kit


As I was making the playdough for our class to build their own snowmen, it struck me that it would be fun to make a Build-Your-Own Snowman Kit!  When I thought of this, it was getting late, and my daughter's birthday was the next day.  But...being the kind of person that can't seem to stop until something is done and knowing that my girl adores anything crafty and creative, I forged ahead and decided that this kit would be one of her birthday presents!

Want to make one for your kiddo?  It's easy peasy!  Check it out...
 
I already had all of the "ingredients" at home or in the recycling bin.  (My husband teases me for saving boxes and other recyclables, but they come in handy for crafting!)  I packaged these little goodies in a sandwich-sized zipper bag.  Here is what I gathered: 
  • Scarves: colorful strips of fabric that I thought my girl would like.  Don't you love the rainbow cheetah print?!  I snipped fringe at the end of each.
  • Eyes: assorted sizes of googlies
  • Nose: large orange pony bead and the orange tip of an Elmer's glue bottle
  • Buttons: various sizes and colors
  • Arms: popsicle sticks and bobby pins
  • Hat: recycled top from a sports bottle
  • Miscellaneous: small silver bells, heart hairpin and silver string, all for extra embellishments
  •  

Next I used my favorite playdough recipe (below) that I learned about when I first started teaching
pre-k.  I doubled the recipe, let it cool, and packaged it in a clear bag with a twist tie.  You could even add vanilla or peppermint to scent it or glitter to add a little sparkle!
 
Then I went back to the recycling bin and found the perfect container to package everything in.  (A large, clear, plastic container works best.)  I grabbed some complementary blue construction paper to cover the original pretzel label, then printed my own Build-Your-Own Snowman label to top it off.  Since it was a birthday gift, I also added a cute little bow as well.  :)
 
When she found her kit on the table the next morning, she was so excited!  After school, she made her first of many adorably sweet snowmen.  I love how she tipped the hat over to the side and used all 3 scarves!  This is definitely going to be one of her favorites for awhile.  :)
 
If you decide to make this cute, little treat for your sweet pea, be sure to leave a comment.  I'd love to see pictures of your little crafter's snowmen!  Have fun!!
 
 
Homemade Playdough Recipe
(This is for a single batch.  Double everything for an extra large, softball-sized ball of dough.)
 
1 C. water
1 C. flour
1/2 C. salt
1 T. cream of tartar
1 T. canola/vegetable oil
food coloring, glitter, etc (if desired)
 
Mix all ingredients together in a large pot over medium heat.  Stir constantly, making sure to scrape bottom and sides of pot as playdough begins to solidify.  Remove from heat once dough is no longer sticky and has formed a ball.  Let cool on counter.  While still warm, knead dough.  (This is the point where you would add food coloring, glitter, etc.)  Store in an air-tight container or zipper bag.


January 16, 2013

Snowballs Everywhere!

We had a fun, exciting class today! 
 
We started out by reading:
The Biggest Snowball Fight (Rhyme Time Readers)
Each time someone was hit with a snowball in this book, it went in their coat and down their pants.  So in order to get the snowball out, they had to do the cold snowball dance!  Can you guess what we did in our class?  You got it - the cold snowball dance!  The children had loads of fun wiggling, jiggling and giggling to get their pretend snowballs out!

During Centers, the kids were able to build their own playdough snowman.  On each tray, we included a large ball of white playdough, a hat (bottlecap), googly eyes, a scarf, buttons, carrot nose (orange pipe cleaner) and sticks for arms (brown pipe cleaners).  Some kids made flattened out, melty snowmen, like the one below, and others made 3D ones.  They mashed them down so quickly after making the 3D snowmen that I didn't have a chance to take a picture!

 
Our art project was to make a snowman stick magnet.  Aren't these super cute?!  One of my own kids made one a few years ago, and I've seen them on the web on several blogs.  I love the faces, and the range of emotion that's shown, just by drawing different kinds of mouths - some are happy, sad, so/so, and one even looks surprised!  These will come home on Friday.  :)
 
 
Our end-of-day story was:
Snowball Soup (Little Critter, My First I Can Read)
What do you feed a snowman?  Snowball soup, of course!
 
Our other activities of the day included:
  • reviewed the letter Oo, signing and sounding it out, naming words that begin with Oo
  • practiced writing the uppercase alphabet
  • used fine motor muscles to dot a colorful snowball
  • indoor SNOWBALL FIGHT!  This was a lot of fun!  We used wadded up paper, and the kids had fun throwing snowballs at each other.  They even bombarded me and Miss D!
Ask your kiddo what he/she liked best about today.  Maybe you can even get them to do the wiggly, jiggly COLD SNOWBALL DANCE! 

January 14, 2013

Snowboys & Snowgirls

Today, we started our new Letter of the Week, Oo, and talked about how it is one of those tricky vowels that makes two sounds.  Ask your kiddo if he/she can tell you (and show you with sign language) Oo's two different sounds.
 
  We read the book:
Snowmen at Night
 
In art/literacy, we made these darling snowmen out of torn paper.  (I saw this idea on Pinterest.)  We asked each child what their snowman (or snowgirl) did at night, and we got some pretty awesome responses!  Check out the one below:
 
Isn't that super cute?!
 
For math, we worked on size discrimination (from Royal Baloo), and most kids have a good handle on this.  We gave them several snowmen, which they placed in the small, medium or large boxes.
 
In literacy, we worked on matching uppercase letters (on snowman's buttons) to lowercase letters (on snowman's hat).  This was an optional activity, but I was happy to see that many children wanted to play! :)
 
We also had a felt snowman set available for the kiddos to play with.  I heard some pretty funny stories during playtime!  Bonus - I even got to quiz them on the name of the bird that's on one snowman's hat!
 
Hope you're having a marvelous Monday!


January 13, 2013

Nn is for Newspaper


This activity made me giggle a little, because the kids looked at me with such concern - "We're writing on the newspaper?!"  So cute!
 
I dashed Nn on a piece of newspaper for each child to trace with a marker.  Then I asked them to choose a different color marker, and find and circle some additional Nn's.
 
This was a great activity, because there were so many words and letters to look at on each sheet of newspaper.  We live in such a print-rich world, so anytime your child is exposed to letters, numbers and words, they get the benefit of becoming more familiar with their alphabet and numbers.
 
The children also showed me the sign for Nn, sounded out /n/, and gave me an Nn word.  During Circle, we practices skywriting upper and lowercase Nn.
 
Want more Nn ideas?  Check these out!


Evergreen Trees & Cardinals

On Friday, we learned all about evergreen trees and our state bird, the cardinal.  Have you seen any flying about or perched on a pine tree?  I haven't yet, but I'm always on the lookout!
 
We looked at pictures from:
A Possible Tree
 
and read:
Snowballs
 
In art, we made a snow-covered evergreen tree by dabbing white paint with a cotton ball.  Then we glued on two cardinals - a red one (male) and a brown one (female).  We talked a lot about which color the boys and girls are.  Some kiddos were so cute, and called the red ones the daddy birds and the brown ones the mommy birds.  Adorable!  These will be clipped in the hallway for you to see.
 
Our fine motor activity was the colorful snowflake drop.  We used a little tiny ladle (it is seriously the cutest thing ever!) to scoop up sparkly poms and place them on the holes of a small tray.  There were 12 in all, and the kids did a great job - especially since they weren't supposed to use their free hand for assistance!
 
In math, the kids played our tree number match game.  Numbers 1-10 are traced on an evergreen cutout, and the kids used plastic numbers to match them.  Then the hard part - pointing and counting them in order!  They did a super job.  :)
 
After snack, we played in the block room for a bit.  The children love the gingerbread tub so much that we decided to leave it for January.  (We played with it all through December as well.)  It's simply flour, salt, nutmeg and allspice.  Come in and take a whiff - it smells sooooo good!  Our tub also includes:
- gingerbread friends
- pine cones
- plastic trucks
- scoops/spoons
- empty spice shakers
- cups

 
We also completed our letter Nn literacy activity, which I will cover in the next post.  It was a fun, busy, productive day!